
Installing an under-sink water filter might seem intimidating at first, but it’s easier than most people think — especially with the right prep. Whether you’re upgrading from a basic pitcher or ditching bottled water altogether, this step-by-step guide will walk you through the full install process.
🛠️ No plumbing license required — just a wrench, a little patience, and a free afternoon.
✅ Quick Takeaways
- 🚰 Under-sink filters connect to your cold water line and route water through filter cartridges before it reaches the faucet.
- 🔧 Most systems are beginner-friendly and don’t require major plumbing changes — ideal for renters too.
- 💡 The setup process includes installing a faucet (if needed), connecting a T-adapter, and mounting the filter unit.
- 🧽 Be sure to flush the filter after installation to clear out any carbon dust — especially with carbon block systems.
- 💰 Not a DIYer? A plumber can install a typical system for under $300 — still cheaper than buying bottled water long-term.
🧠 How Do These Filter Systems Work?
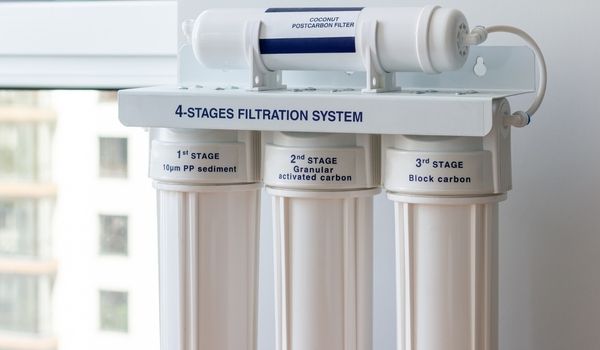
Unlike point-of-entry systems that treat every drop, under-sink filters focus on just one tap — usually your kitchen. These systems connect directly to the cold water line under your sink and route water through one or more filter cartridges before it reaches a separate faucet.
They don’t require any permanent plumbing changes — which makes them:
- Perfect for renters or apartment setups
- Easy to install without cutting into walls
- A simple fix for drinking water without overhauling your entire plumbing system
💡 Bonus: Many models filter out chlorine, sediment, VOCs, and even heavy metals like lead or arsenic — depending on the cartridges used. Reverse osmosis units take it even further by removing fluoride, nitrates, and other dissolved solids.
🧰 Tools You’ll Need to Get Started
Installing a water filter under your sink isn’t rocket science — and you don’t need a plumber’s license to pull it off. Most systems come with everything you need to get started. Here’s a simple breakdown to guide you through it.
| 🔧 Step | 💡 What To Do |
|---|---|
| 📦 Unpack the Filter | Make sure all parts are included before you begin — nothing slows you down like a missing fitting |
| 📘 Read the Manual | Scan the installation guide to catch brand-specific tips — especially fitting sizes and any prep steps |
| 🧰 Gather Tools | Grab scissors, adjustable wrench, Teflon tape, screwdriver, and silicone caulk — a towel helps too |
| 🚰 Shut Off Cold Water | Turn off the cold water valve under your sink and open the tap to release pressure |
| 🕳️ Prep the Sink | Use an existing hole (like a soap dispenser) for the filter faucet — or drill if needed (carefully!) |
| 🔩 Mount the Faucet | Install the filtered faucet using included gaskets and caulk to seal things up |
| 🔁 Add the T-Valve | Remove cold water tubing and install the T-adapter with plumber’s tape to split the line |
| 🔧 Mount the Filter | Use the included bracket to attach the system to your cabinet wall — allow space for cartridge swaps |
| 🔗 Connect Tubing | Run the inlet from the cold line to the filter, then outlet to the new faucet |
| 💦 Turn On the Water | Slowly open the valve, check for leaks, and press the pressure-release button if included |
| 🚿 Flush the Filter | Let the water run for a few minutes to clear out carbon dust and air bubbles |
Once it’s installed, you’ll have filtered water on tap — no more bottled waste or questionable tap water. Most under-sink systems only need cartridge changes every 6–12 months, so it’s a one-time setup with long-term benefits.
💰 What If You’d Rather Hire a Pro?

Not everyone loves a weekend plumbing project — and that’s okay. If you’d rather leave the installation to someone else, here’s what to expect:
- Most plumbers charge $150–$300 to install a standard under-sink filter.
- For reverse osmosis systems, expect to be closer to the higher end if a separate faucet or drain line is involved.
- If your countertop is granite or quartz and needs a hole drilled, that might bump up the cost — or require a countertop pro.
💡 Good to Know: If you’re tight on space or dealing with a complex setup, hiring help can save time (and avoid cracked countertops). For simple installs, though, most people handle it just fine solo.
✅ Final Thoughts
Installing a water filter under your sink isn’t just a smart upgrade — it’s one of the simplest ways to take control of your tap water. Whether you’re ditching chlorine taste, carbon dust, or want peace of mind from invisible contaminants, a compact system can make a big difference.
🛠️ If you’re handy with basic tools, most filters take under an hour to install — no plumber required. And if you’d rather call in help, it’s still one of the most affordable water upgrades you can make.
💡 Whether you go DIY or hire it out, filtered water on tap is just a few steps away.
 131 people found this helpful. Was this guide helpful to you?