
If your whole-house water filter is leaking, start by shutting off the water and finding the exact leak point before you tighten, replace, or disassemble anything. Most leaks come from the housing, fittings, pressure relief button, O-ring, or a cracked part — not from the entire system failing.
That matters because the fix depends on where the leak starts. A loose housing, dirty O-ring groove, worn gasket, or cracked canister all look similar once water starts dripping down the side of the unit. The first job is to isolate the source.
If the leak is small, the repair is often simple. If the housing is cracked, the relief button leaks, or the head on a single-tank unit is dripping from above, that is a different situation. This guide walks through the most common leak points and what to do next.
⚡ Quick Take: Why Whole-House Filters Leak
- Most common leak points: housing sump, O-ring, pressure relief button, threaded fittings, cracked canister, or the top control head on a tank system
- Most common causes: loose or overtightened housings, worn O-rings, clogged cartridges, cracked plastic, or pressure problems
- First move: shut off the water, relieve pressure, dry the area, and identify the exact source before touching anything else
- Do not do this: do not try to patch a cracked housing with glue, tape, or epoxy and put it back in service
🧰 Simple rule: If you cannot tell where the leak starts, dry everything first and watch the system as it repressurizes slowly.
💧 Where Whole-House Water Filters Usually Leak

Whole-house filter leaks usually come from a small number of failure points. The trick is not guessing too early.
| Leak Point | What Usually Causes It | What to Check First |
|---|---|---|
| Housing sump / canister | Loose housing, cross-threading, overtightening, crack | Threads, hairline cracks, seating surface, O-ring |
| O-ring or gasket | Drying out, twisting, dirt in groove, wear | Condition of seal and cleanliness of groove |
| Threaded fittings | Loose connections, bad sealant, stress on plumbing | Inlet/outlet fittings and nearby joints |
| Pressure relief button | Worn seal, dirt, age | Top of housing head |
| Cartridge restriction | Clogged filter causing pressure stress | Pressure gauges or overdue filter life |
| Single-tank control head | Top seal, valve parts, tubing, condensation confusion | Top-down inspection of head, fittings, and tubing |
💡 Helpful Note: Water often runs down the body of the system before it drips to the floor. The puddle is not always where the leak starts.
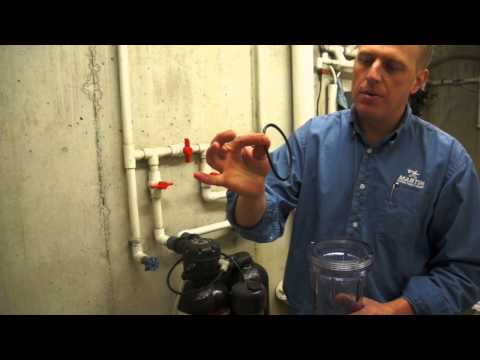
🧰 How to Troubleshoot a Leaking Cartridge-Based Filter
If you have a cartridge-based whole-house filter, the housing, O-ring, and fittings are the first places to check.
🛠️ What You’ll Need
- Plastic filter wrench
- Bucket and towels
- Food-grade silicone grease
- Replacement O-rings or gaskets
- Spare cartridge
- Teflon tape, if threaded fittings need resealing
🔍 Step-by-Step Checklist
- 1. Shut off the water supply. Use the main shutoff or the filter bypass valve. If your system has a bypass, use it. Here’s how to use a bypass valve.
- 2. Relieve pressure before opening anything. Use the pressure relief button if your housing has one. If it does not, open a nearby faucet before loosening the sump.
- 3. Dry the system completely. Wipe the housing, head, fittings, and surrounding plumbing so you can see where fresh water appears.
- 4. Remove the housing carefully. Use the plastic wrench. Do not force a stuck housing with metal tools that can crack or distort it.
- 5. Inspect the cartridge. A badly clogged or collapsing cartridge can increase pressure stress. Replace it if it is dirty, deformed, or overdue.
- 6. Inspect the O-ring and groove. Look for flattening, twisting, cracks, dirt, or debris in the groove. Clean the groove and apply a light coat of food-grade silicone grease before reinstalling or replacing the seal.
- 7. Inspect the housing for cracks. Check the threads, bottom, and sidewalls closely. If the housing is cracked, replace it. Do not patch it and put it back in service.
- 8. Reassemble by hand. Make sure the sump is seated evenly and not cross-threaded. Hand-tighten unless the manufacturer says otherwise.
- 9. Restore water slowly. Bring pressure back gradually and watch the housing closely for drips.
- 10. Check fittings last. If the housing is dry but the joints are wet, the leak may be at the threaded connections rather than the filter body.
📌 The most common DIY fix: clean the O-ring groove, replace the O-ring if needed, reinstall the housing evenly, and bring pressure back slowly.
⚠️ Common Cartridge Filter Leak Mistakes
- Using a metal wrench and cracking the housing
- Reusing a dry, twisted, or flattened O-ring
- Cross-threading the sump during reinstall
- Overtightening the housing after the O-ring is already sealing
- Trying to seal a cracked housing with glue or tape
🛢️ Troubleshooting a Leaking Single-Tank or Softener System

Single-tank filters and softeners leak differently than cartridge housings. When these systems drip, the source is often near the top of the unit rather than the tank body itself.
🧩 Step-by-Step Troubleshooting
- 1. Rule out condensation first. If the outside of the tank is evenly wet, it may be condensation rather than a leak.
- 2. Start at the top. Water from the control head often runs down the tank and pools at the bottom, which makes the leak look lower than it really is.
- 3. Inspect the control head and top fittings. Check the head, bypass, valve body, and any tubing or drain connections.
- 4. Check connector tubing. On softeners or dual-tank systems, inspect the tubing between tanks for cracks, loose fittings, or stress.
- 5. Check the brine tank if applicable. If it is a salt-based softener, inspect the brine tank, brine line, and overflow area for pooling or cracks.
- 6. Look for valve-related seepage. If the leak is coming from the control head itself, that usually moves beyond simple housing troubleshooting and into valve service or part replacement.
💡 Good to Know: If the tank body itself is damaged or the top valve assembly is leaking internally, that is usually not the same kind of easy DIY repair as replacing an O-ring on a cartridge housing.
🛡️ How to Prevent Whole-House Filter Leaks

The best way to deal with a leak is to avoid creating one in the first place.
- Change cartridges on time. A badly clogged cartridge can increase pressure stress.
- Use the right wrench. The wrong tool can distort or crack the housing.
- Keep spare O-rings and one spare housing if possible. Small parts fail at inconvenient times.
- Install and use a bypass valve. It makes service much easier and lowers the odds of rushed mistakes.
- Watch pressure changes. A sudden drop or unusual gauge reading can signal a clog or developing restriction.
💡 Helpful Note: If a manufacturer eventually covers a cracked housing under warranty, that still does not help much if you need the system back online today. Keeping one spare housing on hand can save a lot of stress.
🧱 How to Reduce Water Damage If a Leak Happens

Even a small drip can become expensive if the system sits where nobody looks at it for months.
- Install over concrete or in a serviceable area if possible. Basements, utility spaces, and garages are easier to manage than finished living space.
- Use a tray, mat, or barrier below the system. It makes leaks easier to spot and can protect nearby surfaces.
- Keep storage and electronics away from the system. Even slow drips can ruin things sitting nearby.
- Add a leak detector. A simple water alarm or smart leak sensor can catch problems earlier.
- Check the system monthly. Look for drips, mineral trails, dampness, or pressure changes.
🚨 When to Stop DIY and Call a Pro
- The housing is cracked and you do not have the replacement part
- The leak is coming from the top valve or control head of a tank system
- You suspect pressure problems beyond a simple clogged filter
- The system is leaking at glued or hard-plumbed connections you are not comfortable reworking
- You shut the water off and still cannot isolate where the leak starts
🧠 Final Thoughts
A leaking whole-house water filter is usually a troubleshooting problem before it becomes a replacement problem. Start by shutting off the water, relieving pressure, drying the system, and finding the exact leak point.
Many leaks come down to a worn O-ring, a dirty groove, a loose housing, or a clogged cartridge creating extra stress. Those are manageable. A cracked housing or leaking control head is a different level of repair.
If you’re just getting started, here’s an overview of whole-house filters that covers the basics.
The goal is simple: find the source first, fix the right part, and do not put a damaged component back into service just because the drip stopped for a few minutes.
 99 people found this helpful. Was this guide helpful to you?