
Whole-house filters do a great job cleaning up your water—but sometimes you need a way around them. Whether you’re doing maintenance, switching cartridges, or just want unfiltered water for a specific task, a bypass valve gives you options.
It’s a simple upgrade that pays off big time. And if you’re even slightly handy, you can likely do it yourself.
💡 Quick Takeaways
- 🛠️ A bypass lets you reroute water around your whole-house filter when needed
- 🚰 It helps with maintenance, repairs, or using unfiltered water outdoors
- 💸 You’ll save money by reducing wear on filter cartridges and media
- 🧰 Installation is DIY-friendly with basic plumbing tools and a little prep
- 📍 We’ll walk you through where to install it, what tools you’ll need, and how to test it.
🔄 What a Bypass Valve Actually Does
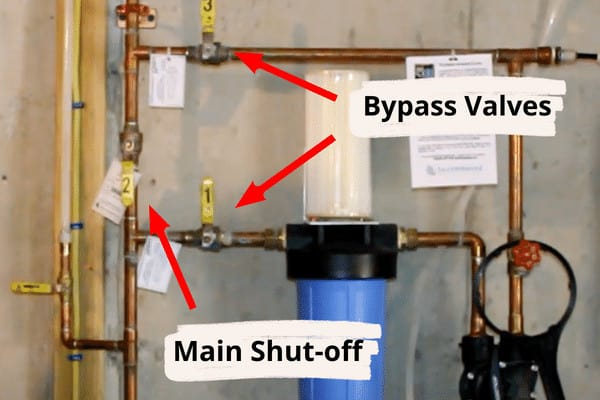
A bypass is a simple plumbing setup—usually three ball valves—that lets water flow around your filtration system instead of through it.
Here’s how it works:
- Normal mode: Water flows through the filter → left and right valves open, center valve closed
- Bypass mode: Water skips the filter → left and right valves closed, center valve open
Just twist the handles to switch modes. No tools required. No full system shutdown.
🧠 Good to Know: Some filters come with a built-in bypass, but they’re not always easy to access or repair. Adding an external bypass gives you full control—and a solid backup if the built-in one ever fails.
💡 Why Add a Bypass in the First Place?
Your whole-house filter is designed to run full-time—but that doesn’t mean it always should. Here’s when (and why) bypassing it makes sense:
- 🧽 Easier Maintenance: If you ever need to change your filter or troubleshoot a leak, shutting off the entire house isn’t ideal. A bypass lets you isolate the filter and work on it without shutting down your home’s water supply.
- 🚿 No Interruptions: Need to shower while doing filter maintenance? No problem. A bypass keeps water flowing to your taps—even if the filter is off or out.
- 🌱 Use Unfiltered Water (When It Makes Sense): Washing the car? Filling the pool? Watering the garden? You don’t need filtered water for that—and skipping the filter saves wear on your cartridges or media.
- 💰 Long-Term Savings: Every gallon that runs through your system adds wear. Bypassing it when filtered water isn’t necessary helps extend the life of your filter—and cuts down on replacement costs.
🛠️ Pro Tip: It’s basically a money-saving detour built into your plumbing.
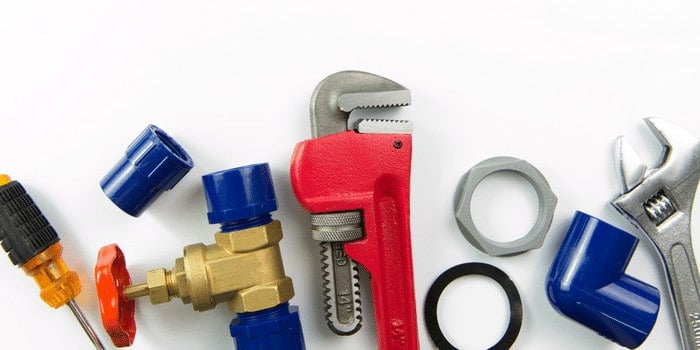
🧰 Tools You’ll Need for the Job

Installing a bypass isn’t hard—but having the right tools on hand can make or break your day. Depending on your plumbing type (PVC, copper, or PEX), your supplies may vary a bit.
🔧 Common Tools & Supplies Checklist
| 🛠 Tool | 📦 Use |
|---|---|
| Pipe cutter or hacksaw | To cut into the main water line cleanly |
| Three ball valves | Forms the bypass loop (left, center, and right) |
| Teflon tape / Pipe dope | Seals threaded fittings to prevent leaks |
| Wrench / Pliers | Tighten fittings and valves securely |
| Bucket + towel | For catching any residual water during install |
| Marker or pencil | To mark your cut points accurately |
| Optional: solder/flux or PVC glue | Used only if working with copper or PVC pipe types |
💡 Pro Tip: If you’re not sure what kind of pipes you have, check near your water meter or shutoff valve. Copper has a metallic shine, PVC is white or gray plastic, and PEX is flexible tubing (usually red, blue, or white).
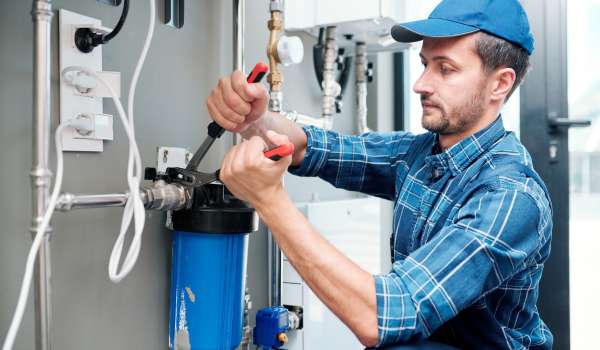
🛠️ How to Install a Filter Bypass (Step-by-Step)
You don’t need to be a pro to install a bypass valve—but you do need a plan. This quick breakdown will help you stay ahead of mistakes and leaks.
📋 What to Do Before You Cut That Pipe
| 🔧 Steps: | 📋 What to Do |
|---|---|
| Step 1 | Shut off your main water supply and drain any remaining water from the lines. |
| Step 2 | Read the filter’s manual—some models include special instructions for bypass setups. |
| Step 3 | Mark the pipe where you’ll install the bypass. Measure twice, cut once. |
| Step 4 | Gather tools: pipe cutter or hacksaw, wrench, fittings, valves, and Teflon tape. |
| Step 5 | Cut the pipe, lay out the valve positions, and dry-fit everything before sealing it. |
| Step 6 | Install and secure each connection using compression fittings, solder, or glue—depending on pipe type. |
| Step 7 | Turn the water back on slowly and inspect for leaks at every joint. |
💡 Smart Tip: Lay out the full bypass setup on the floor before installing anything. Seeing it in 3D helps prevent wrong cuts and backward valve installs—common rookie mistakes.
📍 Where Should You Install the Bypass?

The best spot for your bypass is as close as possible to the water filter itself, ideally just before water enters the system.
Here’s what to keep in mind:
- 🔁 Upstream from the filter – so it can fully divert water before it reaches the media
- 💧 Before your water heater – this ensures both hot and cold water lines are covered
- 📏 With enough clearance – leave space for valves and fittings, especially if you’re working in a tight utility area
🧠 Good to Know: If your filter setup is in a cramped basement corner, consider adding flexible pipe connectors or elbows to make the layout easier to manage.
✂️ Prepping and Laying Out the Bypass
Before you start gluing or soldering anything, it’s smart to dry-fit the setup. Seeing the full layout in front of you can help you avoid alignment mistakes—and save you from rework later.
Here’s what to do:
- Lay out the three ball valves (left, center, right) and all connecting pipes on the floor
- Double-check spacing between valves so everything fits snugly without strain
- Make sure you’re orienting the valves correctly—handles should be easy to reach and turn
- If mounting to a wall, mark where the bracket will go and confirm valve alignment
🧠 Good to Know: Preassembly also gives you a chance to check for missing parts or fittings—before your pipe is cut and you’re halfway into the install.
🔩 Putting It All Together (And Testing for Leaks)
Once everything’s laid out and double-checked, you’re ready to make it permanent.
🛠 Final Assembly
- Start by connecting each piece one by one: left valve → pipe → center valve → pipe → right valve
- Use compression fittings, solder, or PVC cement—whatever matches your pipe material
- Make sure each connection is tight and aligned, with no tension or bending
Take your time. This part’s all about precision.
💦 Test the Setup
- Slowly turn the main water supply back on
- Open one faucet to let air escape from the system
- Check every joint with a dry paper towel to spot leaks early
- Switch the bypass on and off to make sure valves are working correctly
🧠 Pro Tip: If you find a small drip, don’t panic—tighten the fitting slightly or rewrap with Teflon tape. It’s common to need a few adjustments.
✅ Final Thoughts
A bypass valve might seem like a small upgrade—but it gives you serious flexibility. Whether you’re changing a filter, need unfiltered water for a job, or just want peace of mind during maintenance, this little plumbing detour saves time, stress, and wear on your system.
And once it’s in? You’ll wonder how you ever lived without it.
🛠️ Want to dig deeper into how your whole-house filtration system works? Or thinking about changing your filter cartridge? We’ve got you covered.
 153 people found this helpful. Was this guide helpful to you?