
If you rely on a private well for drinking water, you’re not alone — over 43 million Americans do. But here’s the catch: it’s up to you to make sure that water is safe to drink.
Unlike city water systems, there’s no municipal monitoring or automatic testing. Staying ahead of potential bacteria problems is one of the best ways to protect your health — and your peace of mind.
Whether you’re new to well ownership or just due for your next test, we’ll help you figure out what to check for, how often, and how to get accurate results.
💡 Key Takeaways
- 🧪 Test annually for coliform bacteria — more often if you use fertilizer or live near potential contamination sources.
- 🏠 Well owners are responsible for their own water safety — unlike city water, there’s no automatic testing.
- 🚱 Bacteria can enter through surface water, septic systems, or poorly sealed wells.
- 🔬 Total coliform, E. coli, and fecal coliform are the main bacteria to watch for.
- 🧼 Don’t rely on DIY kits for bacterial testing — certified lab results are far more accurate.
- 🛡️ Filtration systems like UV, RO, or chemical injection can treat bacterial contamination effectively.
💧 How Does Bacteria Get Into Well Water?

Even with a sealed well, bacteria can still sneak in through a few common sources:
- 🌧️ Surface water runoff – Rain and snowmelt can carry bacteria from soil, animal waste, or fertilizers into your well if it’s not properly sealed or located in a safe spot.
- 🚽 Nearby septic systems – If a septic system is too close to your well or leaks due to damage or poor design, bacteria can leach into the groundwater supply.
- 🌱 Nitrate & nitrite contamination – These compounds often come from fertilizers or decaying organic matter. If you’re using manure or live near farms, regular testing is essential.
👉 Poorly constructed or shallow wells are at the greatest risk — and any visible damage or changes in water quality should prompt testing right away.
🔁 How Often Should You Test for Bacteria?

Routine testing isn’t just a good idea — it’s essential if you rely on a private well. Here’s what most experts recommend, including the CDC:
- 🧪 Test for coliform bacteria once per year — more often (every 6–12 months) if you use fertilizers, have shallow wells, or live near farms or septic systems.
- 🌾 Test for nitrates/nitrites annually — especially if you suspect contamination from lawn chemicals, agriculture, or septic leaks.
⚠️ Also test immediately if:
- Anyone gets sick with nausea, diarrhea, or stomach cramps
- You notice a strong sulfur or rotten egg smell
- The water looks cloudy or discolored
- You’ve had previous bacteria problems that weren’t professionally resolved
🔍 Tip: Professional lab testing is the most accurate — and often costs less than you’d expect.
🧪 What Bacteria Should You Test For?
There are three main types labs look for when checking well water for bacterial contamination. Here’s the rundown:
- Total Coliform: Think of this as the canary in the coal mine. These bacteria show up in soil, on plants, and in surface water.
- They’re not usually dangerous on their own — but if they make it into your well, it’s a clue that something else might, too.
- E. coli: This one’s a bit more serious. Escherichia coli lives in the intestines of people and animals, so if it turns up in your results, it likely means fecal matter has entered your well — and that’s definitely not something you want in your drinking water.
- Fecal Coliform: Basically, these are coliforms with a very clear origin: poop. Their presence usually points to recent contamination from sewage or animal waste — and that’s a problem worth solving fast.
💡 Bottom line: At minimum, run a total coliform test once a year. If results are positive, your lab will typically follow up with testing for E. coli and fecal coliforms to pinpoint the problem.
🔍 How to Test Your Well for Bacteria
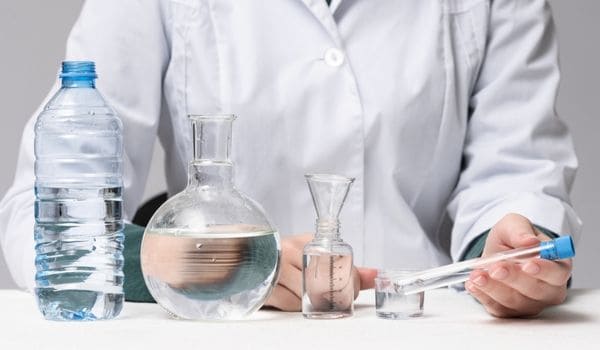
Testing your well water quality is a crucial step in water treatment. A test will let you know if your water is safe to drink and how it can be improved. Furthermore, we’ll discuss water testing methods for bacteria as well as how to take a water sample from a well.
You’ve got two options:
🏠 At-home test kits:
DIY kits are cheap and convenient — but not always accurate.
They can help you screen for things like pH or hardness, but when it comes to bacteria, they’re not as reliable. If you’re after peace of mind, skip these for now.
🔬 Certified lab testing:
A professional lab test is the gold standard. It’ll give you precise results and expert guidance if something’s off. The best part? It’s not as expensive as it sounds — usually around $150–$300.
Most include testing for:
- Total coliform
- E. coli
- Fecal coliform
- Nitrate and nitrite
- pH and hardness
We recommend labs like SimpleLab — they make the process super simple and mail results straight to your inbox.
You can also check out our full list of top water test kits.
💡 Pro tip: Always follow your test kit’s instructions closely, and use a clean container for your sample — no shortcuts here.
🚰 What Removes Bacteria from Well Water?

If your test results show contamination, don’t panic — you’ve got solid treatment options. Each works differently, so let’s break them down.
🔄 Reverse Osmosis (RO)
RO systems are excellent at removing bacteria and a long list of other contaminants like nitrates, arsenic, and lead.
But there’s a catch — bacteria can damage the membrane if it’s not pre-filtered properly. You’ll need a UV light or chlorine injection ahead of the RO system to make it bacteria-safe.
- ✅ Removes up to 99.9% of contaminants
- ❌ Needs sediment and disinfection pre-treatment
- 💲 Higher upfront cost
🧪 Chemical Injection
Chlorine or hydrogen peroxide systems “shock” the water to kill bacteria before it reaches your taps.
These setups work well, especially in problem-prone wells — and they’re widely used on farms and rural properties.
- ✅ Fast, effective disinfection
- ❌ May alter taste, removes beneficial minerals
- 💡 Needs ongoing chemical refills
🔆 UV Purifiers
UV light zaps bacteria as water flows past the bulb — no chemicals, no fuss.
It’s a great option if you want bacteria removal — without changing your water’s taste or mineral balance.
- ✅ Kills 99.99% of microorganisms
- ❌ Doesn’t remove sediment, so you’ll need a pre-filter
- ⚙️ Needs bulb replacement annually
💡 Pro tip: No single system solves everything. Many well owners use a combo — like a sediment pre-filter, followed by UV or chlorination, and then RO at the tap for extra protection.
Have a look at these filtration systems for wells.
❓ FAQ’s

- What should I do if my well water tests positive for bacteria? Stop drinking or cooking with it immediately. Stick to bottled water or boil what you need for at least one full minute. Then schedule a professional water test and plan for disinfection — either by shock chlorination or installing a long-term solution like UV or chemical treatment.
- How much does it cost to disinfect a well? It varies based on your well’s size and the disinfection method. A typical professional disinfection runs $500–$800, but DIY shock chlorination kits are far cheaper if you’re comfortable doing the work yourself.
- How long does the disinfection process take? Usually 1–2 days from start to finish. During that time, you won’t be able to drink or cook with your tap water, so have plenty of clean water on hand.
- Do I need to retest after disinfection? Absolutely. Wait about a week, then retest to make sure the treatment worked. If the bacteria is still there, you may need to try a different approach — or check for structural issues with your well.
Final Thoughts
Testing your well water quality is important for safety reasons because it will tell you if the water your drinking and cooking with, is safe for you and your family.
 85 people found this helpful. Was this guide helpful to you?